Our Guide to DIY Hail Damage Repair
Welcome to our comprehensive guide on DIY hail damage repair. Hail storms can wreak havoc on your property, leaving behind unsightly dents and dings. Luckily, with a little know-how and the right tools, you can tackle these repairs yourself and save a significant amount of money.
Repairing hail damage on your own not only allows you to take control of the situation, but it also gives you the opportunity to learn a new skill and feel a sense of accomplishment. In this guide, we will walk you through the step-by-step process of repairing hail damage on various surfaces, from cars and homes to roofs and outdoor furniture.
DIY hail damage repair may seem daunting at first, but with our guidance, you’ll learn the techniques and tricks to restore your belongings to their former glory. We’ll provide you with a list of the essential tools you’ll need, tips on assessing the extent of the damage, and detailed instructions on how to repair dents and cracks.
So, whether you’re looking to repair hail damage on your car or rejuvenate your outdoor furniture, look no further. Our comprehensive guide has got you covered. Get ready to tackle those dents and dings and make your property look as good as new!
Understanding Hail Damage
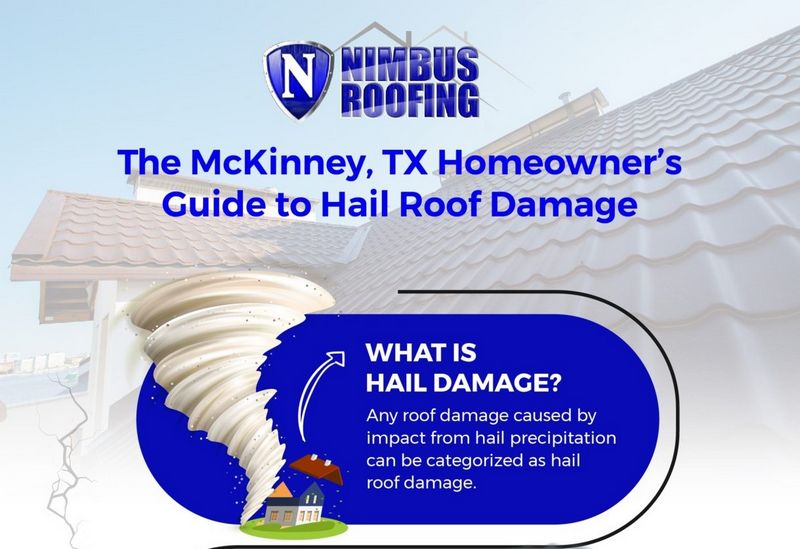
Hail damage can be a frustrating and costly problem for homeowners. Hail is a form of precipitation that consists of small ice pellets or balls. When these hailstones fall from the sky and hit your property, they can cause significant damage to your roof, windows, siding, and other exterior surfaces.
Our guide is here to help you understand the effects of hail damage and how to properly repair it. It’s important to address hail damage as soon as possible to prevent further issues and maintain the integrity of your home.
Here are some key points to consider:
- Types of damage: Hail can cause a variety of damage depending on the size and force of the hailstones. Common types of damage include dents, cracks, chipped paint, broken windows, and punctured surfaces.
- Insurance coverage: Most homeowner’s insurance policies cover hail damage. It’s important to review your policy and understand the extent of your coverage.
- Inspecting for damage: After a hailstorm, it’s essential to inspect your property for any signs of damage. Look for dents, cracks, missing shingles, and broken windows. Don’t forget to check gutters, downspouts, and outdoor appliances as well.
- Repair options: Depending on the extent of the damage, you may be able to repair it yourself or require professional assistance. Small dents and cracks can often be fixed with DIY methods, while severe damage may require the expertise of a professional contractor.
Remember, addressing hail damage promptly is key to preventing further issues and maintaining the value of your home. Consult our comprehensive guide for step-by-step instructions on repairing hail damage and restoring the condition of your property.
Assessing the Damage
Before you begin any repair or DIY project, it is essential to assess the extent of the hail damage. This guide aims to walk you through the process, ensuring that you can effectively address the issue at hand.
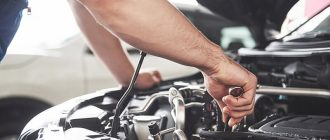
Start by thoroughly inspecting your vehicle, looking for signs of damage caused by hail. Hail damage is often easy to spot due to its distinctive round dents on the surface of the car. These dents may vary in size, and they typically appear as small pits or divots on the metal.
It is important to note that hail damage may not be limited to just the exterior of your vehicle. Inspect the windows, windshield, and mirrors for any cracks, chips, or other types of damage as well. Additionally, check the roof, hood, doors, and trunk for any signs of denting or imperfections caused by hail.
Here are some key steps to follow when accessing the hail damage:
- Start by standing a few feet away from your vehicle to get an overall view of the damage.
- Move closer to inspect individual panels for any signs of dents.
- Run your hands over the surface of the vehicle to feel for any imperfections.
- Use a flashlight to examine hard-to-see areas, such as under the hood or in the wheel wells.
- Take note of the number and severity of the dents and other damage for future reference.
Once you have thoroughly assessed the damage, you will be better equipped to plan your DIY hail damage repair. This guide is here to help you every step of the way, providing you with the necessary information and tips to successfully restore your vehicle to its former glory.
Gathering the Necessary Tools
Before you begin the repair process, it’s important to gather all the necessary tools. This guide will provide you with a comprehensive list of the tools you’ll need to DIY hail damage repair.
- Paintless Dent Repair Kit: This kit will include tools such as dent removal rods, dent removal hooks, glue pullers, and other specialized tools specifically designed for repairing hail damage.
- Heat Gun: A heat gun can be used to warm up the dented area, allowing for easier manipulation of the metal.
- Dent Puller: A dent puller is a device that uses suction to remove dents from the surface of your vehicle. It can be used in combination with glue pullers for more stubborn dents.
- Body Filler/Fiberglass Repair Kit: In some cases, you may need to use body filler or a fiberglass repair kit to fix more severe hail damage. These kits typically include the necessary materials, such as body filler, a sanding block, and other items needed for the repair.
- Sanding Tools: Depending on the severity of the hail damage, you may need various sanding tools to smooth out the damaged area. These can include sandpaper, sanding blocks, and a rotary tool with sanding attachments.
- Primer: After sanding the damaged area, you’ll need to apply primer to ensure a smooth and even surface for painting.
- Paint: Matching the color of your vehicle’s paint is essential for a seamless repair. Make sure to have the correct color paint on hand.
- Clear Coat: Once the paint has dried, applying a clear coat will protect the newly repaired area and give it a glossy finish.
- Microfiber Cloths and Cleaning Products: Before you start repairing the hail damage, make sure to clean the affected area thoroughly. Microfiber cloths and cleaning products designed for automotive use can help remove dirt and debris.
Note: Depending on the severity of the hail damage and the condition of your vehicle, you may need additional tools or materials not listed here. It’s always a good idea to consult a professional or refer to your vehicle’s manual for specific instructions.
Preparing the Vehicle
Before starting the DIY hail damage repair process, it is important to prepare the vehicle properly. This will ensure a smooth and successful repair and prevent any further damage to your vehicle.
- Inspect the Vehicle: Begin by thoroughly inspecting the vehicle for any visible damage caused by the hail. Note down the areas that require repair.
- Clean the Vehicle: It is essential to clean your vehicle’s exterior before beginning the repair process. Use a mild detergent and water to remove any dirt or debris from the surface. This will provide a clean canvas for the repair work.
- Protect Sensitive Areas: Cover any sensitive areas of your vehicle, such as windows, mirrors, or lights, with a protective material. This will prevent any accidental damage during the repair process.
- Gather the Necessary Tools: Collect all the tools and materials required for the DIY repair. This may include a dent removal kit, suction cups, heat gun, hammer, body filler, sandpaper, and primer.
- Choose an Ideal Workspace: Find a well-lit and spacious area where you can easily access all sides of the vehicle. This will make the repair process more convenient and efficient.
By following these preparations, you can ensure that your DIY hail damage repair is carried out effectively and safely. Remember to always prioritize safety and take necessary precautions while working on your vehicle.
Choosing the Repair Method
When it comes to repairing hail damage on your vehicle, there are several options available to you. Depending on the extent of the damage and your DIY skills, you can choose the method that best suits your needs.
1. Paintless Dent Repair (PDR):
- PDR is a popular and effective method for repairing hail damage.
- It involves using specialized tools to gently massage the dented area from the underside.
- This method is best suited for minor dents and does not require any repainting.
- PDR can be done at home with the right tools and some practice, or you can hire a professional for more complex repairs.
2. DIY Dent Removal Kits:
- There are many DIY dent removal kits available on the market.
- These kits usually include suction cups, hot glue, and other tools.
- With these kits, you can attempt to pull out the dents yourself.
- While this method is more affordable, it may not be as effective as PDR for larger or more severe dents.
3. Traditional Body Shop Repair:
- If the hail damage is extensive or if you are not comfortable doing the repairs yourself, you can take your vehicle to a traditional body shop.
- At the body shop, professionals will assess the damage and provide an estimate for the repairs.
- This method is typically more expensive and time-consuming, but it ensures a high-quality repair.
4. Insurance Claim:
- If your vehicle has significant hail damage, it may be covered by your insurance policy.
- You can file a claim with your insurance company and have them handle the repairs.
- This is the most convenient option, as the insurance company will work with approved repair shops to get your vehicle fixed.
- However, you may still be responsible for paying the deductible and dealing with any potential increases in your insurance premium.
Ultimately, the repair method you choose will depend on the extent of the hail damage, your DIY skills, and your budget. Consider all the options available to you and make an informed decision based on your specific needs.
Filling in Small Dents
If your car has been affected by hail damage, you may have noticed small dents on the surface. While these dents may seem minor, it’s important to repair them to prevent further damage and maintain the appearance of your vehicle.
Our DIY Hail Damage Repair Guide offers several methods for filling in small dents, depending on the severity of the damage:
- Paintless Dent Repair (PDR): PDR is a popular method for repairing small dents without the need for repainting. This technique involves using specialized tools to gently push the dents out from the inside of the panels.
- Body Filler: If the dents are deeper or the metal is stretched, you may need to use body filler. Start by cleaning the area and sanding it gently. Mix the body filler according to the manufacturer’s instructions and apply it to the dents. Once dry, sand the filler smooth and apply a coat of primer before painting.
- DIY Dent Removal Kits: There are many dent removal kits available on the market that can be used for filling in small dents. These kits often include specialized tools, adhesives, and instructions for repairing the damage.
- Hair Dryer and Compressed Air: For smaller dents, you can try using a hair dryer and compressed air to pop the dents out. Heat the dent with a hair dryer for a few minutes, then quickly spray compressed air on it. The sudden change in temperature may cause the metal to contract and pop the dent out.
Remember, it’s important to carefully follow the instructions provided in the repair kits or consult a professional if you’re unsure about the best method for filling in small dents on your vehicle. Taking the time to repair these dents can help maintain the value and appearance of your car.
Using Paintless Dent Repair
If you want to repair hail damage on your vehicle in a DIY manner, using paintless dent repair (PDR) may be the best option for you. This technique allows you to fix dents and dings caused by hail without the need for painting or repainting.
How does paintless dent repair work?
Paintless dent repair involves carefully applying pressure to both the inside and outside of a dent in order to manipulate the metal back into its original shape. This is done using specialized tools and techniques that gently push or pull on the affected area until the dent is fully repaired.
Here are some reasons why using paintless dent repair for hail damage is a great choice:
- Cost-effective: Paintless dent repair is generally less expensive than traditional auto body repair methods, as it does not require repainting or extensive panel replacement.
- Time-saving: Since there is no need for repainting, the repair process is usually much quicker with paintless dent repair than with other methods.
- Preserves the original paint: With paintless dent repair, the original paint of your vehicle remains intact, maintaining its factory finish and value.
- Eco-friendly: Paintless dent repair does not involve the use of any chemicals or paints, making it a greener choice for repairing hail damage.
How to use paintless dent repair for hail damage:
While paintless dent repair can be effective for small to medium-sized dents caused by hail, it may not be suitable for severe damage. Here are the general steps to follow:
- Assess the damage: Examine the dents carefully to determine if they are suitable for paintless dent repair. If the dents have sharp creases or are too large, professional assistance may be required.
- Gather the required tools and materials: You will need a dent repair kit, which typically includes various specially designed tools and accessories.
- Prepare the surface: Clean the dented area with soap and water, and use a degreaser to remove any residue or dirt.
- Apply pressure: Use the tools provided in the kit to carefully apply outward and inward pressure to the dent. Start from the outside and work your way towards the center until the dent is fully repaired.
- Inspect and finalize: Once you have completed the repair, inspect the area for any remaining imperfections. Use additional tools as needed to ensure a smooth and seamless finish.
It is important to note that paintless dent repair requires patience, practice, and precision. If you are unsure about your DIY skills or if the damage is significant, it is recommended to seek professional assistance to avoid further complications.
Using paintless dent repair for hail damage can be a cost-effective and efficient way to restore the appearance of your vehicle. However, it is essential to understand the limitations of this method and to exercise caution when attempting repairs on your own.
Applying Body Filler
Body filler is a commonly used material in DIY hail damage repair. It is used to fill in and smooth out dents and dings caused by hail. Here is a step-by-step guide on how to apply body filler:
- Clean the damaged area: Before applying body filler, make sure to clean the damaged area thoroughly. Use soap and water to remove any dirt or debris. This will ensure a smooth application.
- Sand the damaged area: Use sandpaper to smooth down any rough edges and create a surface that the body filler can adhere to. Start with a coarse grit sandpaper and gradually move to a finer grit for a smooth finish.
- Prepare the body filler: Follow the instructions on the body filler packaging to mix the filler properly. Usually, you will need to mix a hardener with the filler to activate it. Be sure to mix it thoroughly for a consistent texture.
- Apply the body filler: Use a putty knife to apply the body filler to the damaged area. Start with a thin layer and gradually build it up until the dent or ding is completely filled. Smooth out the filler as you go to create a seamless surface.
- Allow the filler to dry: Body filler needs time to dry and harden. Check the instructions on the packaging for the recommended drying time. Avoid touching or manipulating the filler while it is drying.
- Sand the filler: Once the filler is dry, use sandpaper again to smooth it down. Start with a coarse grit and gradually move to a finer grit for a smooth finish. This step will help blend the repaired area with the surrounding surface.
- Prime and paint: After sanding, apply a primer to the repaired area to create a smooth base for paint. Once the primer is dry, you can paint the area to match the rest of the vehicle’s surface.
Remember to follow the instructions provided by the body filler manufacturer for the best results. DIY hail damage repair with body filler can be a cost-effective solution, but it may not always produce professional-grade results. If you are unsure about your abilities or the extent of the damage, it’s recommended to seek professional assistance.
Sanding the Body Filler
Once you have successfully applied the body filler to your vehicle’s damaged areas, the next step in your DIY hail damage repair guide is to sand the body filler. Sanding is a crucial step in the process as it helps to smooth out the surface and blend the repairs seamlessly with the rest of the body.
Before you start sanding, ensure that the body filler has completely cured. This usually takes a few hours, but it is important to read the manufacturer’s instructions on the specific curing time for the product you are using.
To sand the body filler, you will need the following materials:
- Sandpaper (80-grit, 120-grit, 220-grit)
- Sanding block or sanding board
- Masking tape
- Wet sanding sponge (optional)
Start by attaching the coarsest sandpaper (80-grit) to your sanding block or sanding board. This rough grit will help to remove excess body filler and level the surface. Begin sanding in a circular motion, applying moderate pressure. It is important to keep the sanding block or board flat against the body to prevent creating uneven surfaces.
As you sand, periodically check the progress by running your hands over the surface. You should feel a smooth and even texture once the filler has been properly sanded. If necessary, continue sanding with the 80-grit sandpaper until you achieve the desired result.
Once you have achieved a smooth surface, switch to the finer sandpaper (120-grit) to further refine the surface. Sand in a back-and-forth motion this time, making sure to cover the entire repaired area. This step helps to remove any remaining imperfections and feather the edges of the body filler for a seamless blend.
After sanding with the 120-grit sandpaper, you can use an even finer sandpaper (220-grit) to achieve a smoother finish. This step is optional but can help to create a flawless surface.
If you prefer a wet sanding method, you can use a wet sanding sponge along with the appropriate grit sandpaper. Wet sanding can help to minimize dust and keep the surface cooler, but it may require more time and effort.
Throughout the sanding process, it is important to pay attention to any low spots, high spots, or uneven areas. If necessary, make additional filler applications and repeat the sanding steps until you are satisfied with the results.
Remember to protect the surrounding areas of your vehicle by using masking tape, especially if you are sanding close to painted or chrome surfaces. The tape will help to prevent accidental damage.
Once you have finished sanding the body filler, wipe down the surface with a clean cloth or tack cloth to remove any dust or debris. Your repairs are now ready for the next step in the DIY hail damage repair guide.
Priming the Surface
Priming the surface is an important step in the DIY hail damage repair process. It helps to ensure that the repair materials adhere properly to the damaged area and provide a long-lasting solution. Here is a comprehensive guide on how to prime the surface effectively:
- Clean the area: Before priming, it is crucial to clean the damaged surface thoroughly. Use a mild detergent and water solution to remove any dirt, debris, or wax that may be present. Wipe the area dry with a clean cloth.
- Sand the damaged area: Use fine-grit sandpaper to lightly sand the damaged area. This helps to create a smooth surface for the primer to adhere to. Be careful not to sand too aggressively, as it may further damage the surface.
- Apply the primer: Choose a high-quality automotive primer specifically designed for hail damage repair. Shake the can well and apply a thin, even coat of primer to the damaged area. Follow the manufacturer’s instructions regarding drying time and number of coats needed.
- Sand the primed surface: Once the primer is dry, use fine-grit sandpaper again to lightly sand the primed surface. This helps to create an even and smooth surface for the repair materials to be applied.
- Inspect for imperfections: After sanding, closely inspect the primed surface for any imperfections or areas that may require additional priming. Make any necessary touch-ups to ensure a perfect foundation for the repair materials.
Priming the surface is a critical step that should not be overlooked in DIY hail damage repair. It creates a strong bond between the damaged area and the repair materials, ensuring a seamless and durable repair. Follow this comprehensive guide to prime the surface effectively and achieve professional-quality results.
Painting the Vehicle
After repairing the hail damage to our vehicle, the next step is to paint it to restore its appearance. This section of our DIY guide will walk you through the process.
Before you begin painting, make sure to clean the surface of the vehicle thoroughly. Remove any dirt, dust, or grease that may affect the paint job. Use a mild soap and water solution and a soft cloth or sponge.
Once the surface is clean, you’ll need to sand it to create a smooth and even surface for the paint. Start by using a coarse grit sandpaper to remove any imperfections or rough spots. Then, switch to a finer grit sandpaper to smooth out the surface even further. Be careful not to oversand or damage the underlying layers of paint.
After sanding, it’s important to properly prime the vehicle. Choose a high-quality automotive primer that is compatible with the paint you’ll be using. Apply the primer in thin, even coats, allowing each coat to dry completely before applying the next one. This will help the paint adhere to the surface and provide a smooth and durable finish.
Once the primer is dry, it’s time to apply the paint. Use a high-quality automotive paint that matches the original color of your vehicle. Follow the manufacturer’s instructions for mixing and applying the paint. Apply the paint in thin, even coats, allowing each coat to dry before applying the next one. This will help prevent drips, runs, and an uneven finish.
| It’s important to work in a well-ventilated area and wear appropriate safety gear, such as a respirator and gloves, when painting your vehicle. |
After applying the final coat of paint, allow it to dry completely. This may take several hours or even days, depending on the type of paint and weather conditions. Once the paint is dry, you can apply a clear coat to protect the finish and give it a glossy shine.
Remember, painting a vehicle can be a complex and time-consuming process. If you’re not confident in your painting skills, it’s always best to consult a professional for the best results.
Now that you’ve successfully painted your vehicle, it should look as good as new, and the hail damage will be a thing of the past. Congratulations on completing this DIY guide!
Buffing and Polishing
After completing the necessary repairs, it is time to buff and polish the surface of your vehicle to restore its shine and smoothness. This step is crucial to achieve a professional-looking finish.
Here is our guide to buffing and polishing your vehicle after hail damage repair:
- Gather the necessary materials: To start the buffing and polishing process, you will need a polishing compound, a buffing pad, and a high-speed buffer. Make sure to choose products that are specifically designed for automotive use.
- Prepare the surface: Before applying the polishing compound, thoroughly clean the repaired area to remove any dirt or debris. This will ensure that you get the best results and prevent any scratches or swirl marks.
- Apply the polishing compound: Take a small amount of the polishing compound and apply it to the buffing pad. Spread it evenly on the surface, focusing on the areas that require extra attention. Remember to always follow the manufacturer’s instructions for the specific product you are using.
- Begin buffing: Start the buffer at a low speed to prevent splattering the compound. Gradually increase the speed and work in small circular motions, applying light to medium pressure. Keep the buffer moving constantly to avoid overheating the paint and causing damage.
- Inspect the surface: After buffing, inspect the surface for any remaining imperfections or dull spots. If needed, repeat the process in those areas until you are satisfied with the level of gloss and smoothness.
- Final polishing: Once you are happy with the overall appearance, switch to a clean buffing pad and perform a final polish. This step will remove any residue and leave the surface with a high-gloss finish.
- Clean up: After completing the buffing and polishing process, clean your vehicle to remove any leftover compound or residue. Use a microfiber cloth and a gentle automotive cleaner to ensure a spotless finish.
Buffing and polishing your vehicle after hail damage repair is a crucial step to restore its original look. Following this DIY guide will help you achieve professional results and save money on expensive body shop services.
Maintaining the Repaired Surface
Once you have completed the necessary repairs to fix the hail damage on your vehicle, it is important to take steps to maintain the repaired surface. Following these maintenance tips will help ensure that your DIY repairs last for the long term:
- Regular Cleaning: Clean the repaired surface regularly using mild soap and water. Avoid using harsh cleaning agents or abrasive materials that may damage the paintwork.
- Waxing: Apply a coat of wax to the repaired area to protect the surface from environmental elements like UV rays and moisture. This will help prevent the paint from fading or peeling.
- Avoiding Extreme Temperatures: Try to park your vehicle in shaded areas or use car covers to protect it from direct sunlight. Extreme heat or cold can cause the paint to expand or contract, which may result in cracking or peeling.
- Regular Inspections: regularly inspect the repaired area for any signs of damage or deterioration. Address any issues immediately to prevent further damage or the need for more extensive repairs.
- Be Careful with Pressure Washing: While pressure washing is an effective method for cleaning your vehicle, avoid using excessive pressure on the repaired surface. High-pressure water can cause the paint to chip or peel.
- Touch-Ups: If you notice any minor scratches or chips on the repaired surface, consider doing touch-up paintwork to prevent rusting and further damage.
By following these maintenance tips, you can help extend the lifespan of your DIY hail damage repairs and keep your vehicle looking its best.
FAQ:
What is hail damage repair?
Hail damage repair is the process of fixing any dents or scratches caused by hailstones on a vehicle or property.
Can I repair hail damage myself?
Yes, you can repair hail damage yourself if it is minor. However, for more severe damage, it is recommended to seek professional help.
What tools do I need for DIY hail damage repair?
For DIY hail damage repair, you will need a heat gun, dry ice or a hail repair kit, a rubber mallet, body filler, sandpaper, and paint.
Are there any risks involved in DIY hail damage repair?
Yes, there are some risks involved in DIY hail damage repair. If you are not skilled or experienced, you may end up causing more damage to your vehicle or property. It is also important to take safety precautions when using certain tools or chemicals.