Getting Your Car Painted After An Accident: A Complete Guide
If you’ve been involved in a car accident, one of the most important steps in the repair process is getting your car painted. This guide will walk you through the steps you need to take to ensure your car looks as good as new.
After an accident, your car may have scratches, dents, or even more extensive damage. Getting your car painted is essential to restore its appearance and protect it from further damage. Whether you have a small scratch or need a complete paint job, this guide will help you navigate the process.
First, assess the damage to your car. Take note of any scratches, dents, or areas where the paint has chipped off. It’s important to know the extent of the damage to determine whether you need a touch-up or a complete repaint. If the damage is extensive, it may be necessary to visit a professional auto body shop.
Next, find a reputable auto body shop that specializes in car painting. Look for a shop that has experience with your make and model of car, as well as positive reviews from previous customers. Ask for recommendations from friends or family who have had their cars painted after an accident. Once you’ve found a shop, schedule a consultation to discuss your car’s needs and receive an estimate for the cost of the paint job.
A Comprehensive Guide to Painting Your Vehicle After a Collision
Getting into a car accident can be a stressful experience, and one of the tasks that may need to be addressed afterward is getting your car painted. Whether it’s a minor scratch or a major collision, painting your vehicle is an essential step in restoring its appearance and value. This comprehensive guide will walk you through the process of painting your car after a collision, ensuring that you have all the information you need to make informed decisions and achieve a professional-looking result.
Step 1: Assess the Damage
Before diving into the painting process, it’s crucial to assess the extent of the damage to your vehicle. This step will help you determine whether you can handle the painting yourself or if it’s necessary to consult a professional auto body shop. If the damage is minor and limited to the paint surface, you may be able to perform touch-ups or repaint specific areas yourself. However, if there are dents, deep scratches, or structural damage, it’s best to seek professional assistance.
Step 2: Gather the Necessary Tools and Materials
Once you have assessed the damage and decided to proceed with painting your car yourself, it’s time to gather the necessary tools and materials. Here’s a list of items you will need:
- Automotive paint
- Primer
- Sandpaper (varying grits)
- Masking tape
- Drop cloths or plastic sheeting
- Paint sprayer or paintbrushes
- Cleaner or degreaser
- Wax and grease remover
- Body filler (if needed)
- Paint thinner or reducer
Step 3: Prepare the Surface
Before applying any paint, it’s essential to properly prepare the surface of your car. This step involves removing any dirt, grease, or wax residue, as well as sanding down the damaged area to create a smooth surface for painting. Clean the area with a degreaser and wax and grease remover, followed by sanding it with progressively finer grit sandpaper. Be sure to mask off any unaffected areas to protect them from overspray.
Step 4: Apply Primer
Priming the damaged area is an important step to ensure proper adhesion of the paint and achieve a flawless finish. Apply a layer of automotive primer, making sure to follow the manufacturer’s instructions for drying time. Once the primer is dry, sand it lightly with fine-grit sandpaper to create a smooth surface for painting.
Step 5: Paint Your Car
It’s finally time to paint your car! Using a paint sprayer or paintbrushes, apply thin, even coats of automotive paint to the primed area. Start with a light coat and allow it to dry before applying subsequent layers. Be patient and take your time to ensure a smooth and professional-looking finish. If using a paint sprayer, make sure to follow the instructions provided by the manufacturer.
Step 6: Final Touches
Once you are satisfied with the paint job, let the paint cure according to the recommended time provided by the paint manufacturer. After the paint has fully cured, you can apply a clear coat for added protection and shine. Finally, polish and wax your entire vehicle to ensure a uniform appearance and enhance the overall finish.
Step 7: Consult a Professional if Needed
If you feel overwhelmed at any point during the painting process or if the damage is extensive, don’t hesitate to consult a professional auto body shop. They have the expertise and equipment necessary to handle complex repairs and ensure a high-quality paint job.
Following this comprehensive guide will help you navigate the process of painting your vehicle after a collision. Remember to prioritize safety and quality throughout the process, and don’t hesitate to seek professional assistance if needed.
Assessing the Damage and Creating a Plan
After an accident, assessing the damage to your car is crucial before proceeding with getting it painted. Here is a step-by-step guide on how to assess the damage and create a plan to get your car looking like new again.
- Inspect your car thoroughly: Start by examining your car closely and identifying any dents, scratches, or areas of chipped paint. Take note of any parts that may need to be replaced or repaired.
- Take photographs: Before visiting an auto body shop, take clear photographs of the damaged areas. This will help technicians understand the extent of the damage and provide accurate estimates.
- Get multiple estimates: Visit several reputable auto body shops and obtain quotes for the necessary repairs and painting. Compare the estimates, taking into account factors such as cost, reputation, and customer reviews.
- Consider insurance coverage: Check whether your insurance policy covers the cost of repairs and painting. Contact your insurance provider to discuss your options and determine the best course of action.
- Create a budget: Based on the estimates, insurance coverage, and your personal financial situation, create a budget for the painting process. This will help you determine how much you are willing and able to spend on the repairs.
- Decide on the paint color: If you wish to change the color of your car, take this opportunity to select a new paint color. Consider factors such as personal preference, resale value, and any local regulations that may restrict certain colors.
- Discuss the plan with the chosen auto body shop: Once you have selected an auto body shop, schedule a consultation with them to discuss your plan. Share the photographs, estimates, and any other relevant information. Collaborate with the technicians to finalize the plan and ensure everyone is on the same page.
By following these steps, you can properly assess the damage to your car and create a plan for getting it painted after an accident. This will enable you to make informed decisions, choose the right auto body shop, and ultimately get your car looking like new again.
Finding a Trustworthy Auto Body Shop
After getting into a car accident, finding a trustworthy auto body shop to repair your vehicle is crucial. The quality of the repair work can greatly affect the appearance and value of your car, so it’s important to choose a shop that you can trust. Here are some steps to help you find a reliable auto body shop:
- Ask for recommendations: Start by asking friends, family, and coworkers if they have any recommendations for auto body shops they have had a good experience with.
- Read online reviews: Look for online reviews of local auto body shops to get an idea of their reputation. Pay attention to both positive and negative reviews to get a balanced view.
- Check for certifications: Look for auto body shops that have certifications from recognized organizations, such as the National Institute for Automotive Service Excellence (ASE) or the Inter-Industry Conference on Auto Collision Repair (I-CAR). These certifications can be a sign of a shop’s commitment to high standards of quality.
- Visit the shop: Schedule a visit to the auto body shop to get a sense of their facilities and equipment. Look for a clean and organized shop with modern equipment, as this can indicate their commitment to providing quality work.
- Ask about warranties: Inquire about the warranties offered by the auto body shop. A reputable shop should offer a warranty on their workmanship to give you peace of mind.
- Get multiple estimates: It’s a good idea to get estimates from several different auto body shops to compare prices and services. Keep in mind that the cheapest option may not always be the best choice, so consider the overall reputation and quality of the shop as well.
- Ask for references: Request references from the auto body shop and contact them to ask about their experience. Hearing directly from past customers can give you valuable insights into the shop’s reliability and customer service.
By following these steps, you can increase your chances of finding a trustworthy auto body shop that will provide high-quality repairs for your car after an accident.
Understanding Insurance Coverage for Repairs
After an accident, one of the first things you need to do is assess the damage to your car and determine the repairs that are necessary. In many cases, this will involve getting your car painted to fix any scratches or dents. Understanding how insurance coverage works for these repairs is essential to ensure you are properly reimbursed for the costs involved.
Insurance coverage for car repairs after an accident typically falls under two categories: collision coverage and comprehensive coverage. It’s important to know which type of coverage you have before proceeding with any repairs.
- collision coverage: This type of coverage is designed to pay for repairs to your car when it is damaged in a collision with another vehicle or object. If you were at fault for the accident, your own collision coverage will typically cover the cost of painting your car after an accident.
- comprehensive coverage: This type of coverage is for damage to your car that occurs outside of a collision, such as theft, vandalism, or natural disasters. If your car was damaged in an accident that was not your fault, the at-fault driver’s insurance should cover the cost of painting your car. However, if the at-fault driver is uninsured or underinsured, your own comprehensive coverage may be used to pay for the repairs.
When filing a claim for car repairs, it’s important to understand the terms of your insurance policy. Some policies may require you to use a specific repair shop or may only cover a portion of the cost of painting your car. It’s also important to document the damage and keep records of any estimates or invoices you receive.
Before proceeding with any repairs, it’s a good idea to contact your insurance company to report the accident and discuss the next steps. They can provide guidance on the claims process and help ensure you receive the coverage you are entitled to.
|
Choosing the Right Paint Color and Finish
When it comes to getting your car painted after an accident, choosing the right paint color and finish is an important decision. Your car’s paint is not only responsible for protecting the metal underneath, but it also contributes to its overall appearance and resale value. Here’s a guide to help you make the right choice.
Consider Your Car’s Original Color
One option is to stick with your car’s original color. This can be a good choice if you’re happy with the current shade and want to keep your car looking like it did before the accident. However, keep in mind that finding an exact match to your car’s original paint color can be challenging, especially if your car is older or has a unique color.
Explore Different Colors
If you’re looking to change things up and give your car a fresh look, consider exploring different colors. Look at car paint swatches or visit a local auto body shop to see what options are available. Keep in mind that certain colors, such as metallic shades, may cost more to paint due to their specialized application process.
Consider Your Car’s Style and Personality
Think about your car’s style and personality when choosing a paint color. A sleek black or metallic silver shade can give your car a sophisticated and elegant look, while a vibrant red or bright blue can add a sporty and eye-catching touch. Consider what will best complement your car’s design and your personal preferences.
Choose the Right Finish
After deciding on a color, it’s time to choose the right finish. The most common options are gloss, matte, and metallic. Gloss finishes offer a shiny and reflective look, while matte finishes provide a muted and sleek appearance. Metallic finishes have a sparkling effect and can give your car a unique and modern look. Consider the maintenance required for each finish to ensure it aligns with your lifestyle.
Consult with a Professional
If you’re having difficulty deciding on a color or finish, it’s always a good idea to consult with a professional. Auto body shops have experience in matching colors and finishes, and they can provide guidance based on your car’s make and model. They can also advise on any additional steps needed for the painting process, such as priming or clear coating.
Conclusion
Choosing the right paint color and finish for your car after an accident is an important decision that can greatly impact your car’s appearance and value. Consider factors such as your car’s original color, different color options, your car’s style and personality, and the right finish for your desired look. Reach out to a professional if you need guidance or assistance in making your choice.
- Consider Your Car’s Original Color
- Explore Different Colors
- Consider Your Car’s Style and Personality
- Choose the Right Finish
- Consult with a Professional
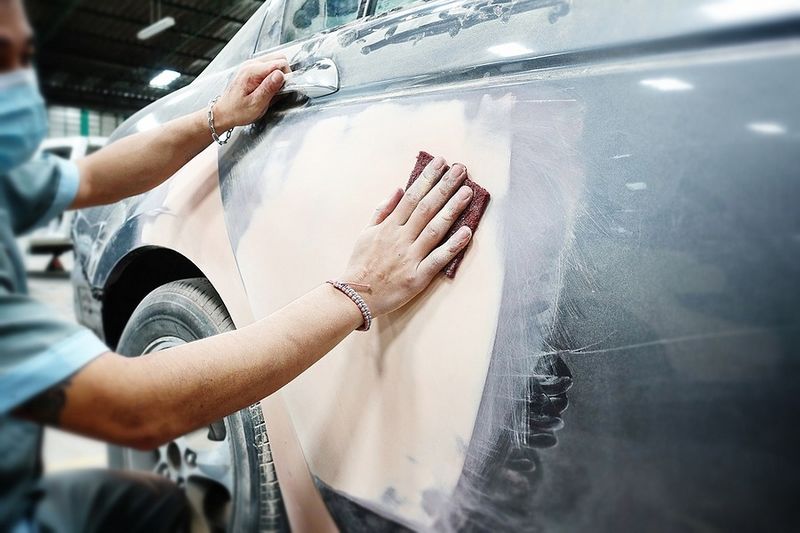
Preparing the Surface for Painting
One of the most important steps in getting your car painted after an accident is preparing the surface. This step is crucial to ensure a smooth and long-lasting paint job. Here is a complete guide to preparing the surface for painting:
- Wash the car thoroughly: Start by giving your car a good wash to remove any dirt, grime, and debris. Use a high-quality car detergent and a soft sponge or cloth to clean the surface. Rinse the car thoroughly with clean water and let it dry completely.
- Sand the damaged area: Next, you need to sand the damaged area to create a smooth surface. Use a fine-grit sandpaper to gently sand the damaged area, removing any peeling paint, rust, or rough edges. Be careful not to sand too harshly, as this can damage the underlying metal or plastic.
- Fill in any dents or scratches: After sanding, inspect the damaged area for any dents or scratches. Use a high-quality body filler to fill in these imperfections. Apply the filler using a putty knife and smooth it out to create an even surface. Allow the filler to dry completely before moving on to the next step.
- Mask off surrounding areas: To protect the surrounding areas from overspray, use masking tape and plastic sheets to mask off any areas that you don’t want to paint. This includes the windows, trim, and other adjacent parts. Take your time to ensure that all areas are properly covered.
- Clean the surface with a degreaser: Before applying the primer, it’s important to clean the surface with a degreaser. This will remove any oils, waxes, or contaminants that could interfere with the adhesion of the paint. Use a lint-free cloth and a suitable degreaser to clean the surface thoroughly.
- Apply a primer: Once the surface is clean and dry, it’s time to apply a primer. The primer will provide a smooth and even base for the paint. Use a high-quality automotive primer and apply it in thin, even coats. Allow the primer to dry completely between coats.
- Sand the primer: After the primer has dried, sand it lightly with a fine-grit sandpaper. This will help to smooth out any imperfections and create a better surface for the paint. Be careful not to sand too much or you may remove the primer altogether.
- Clean the surface again: After sanding the primer, clean the surface again with a degreaser to remove any dust or residue. This will ensure a clean and smooth surface for the final paint job.
- Apply the paint: Finally, it’s time to apply the paint. Use a high-quality automotive paint and apply it in thin, even coats. Allow each coat to dry before applying the next. It’s recommended to apply multiple coats for better coverage and durability.
Following these steps will help you prepare the surface of your car for painting after an accident. Remember to take your time and ensure that each step is done carefully and thoroughly. This will ensure a professional-looking and long-lasting paint job.
Removing Dents and Repairing Body Panels
If your car has been involved in an accident, it’s likely that there may be dents and damage to the body panels. Getting these dents repaired and the body panels back into shape is an important part of the car painting process. Here are some steps to remove dents and repair body panels:
- Assess the damage: Start by examining the dents and damage to determine the severity. Some dents may be minor and can be easily repaired, while others may require more extensive work.
- Prepare the area: Before starting any repairs, it’s important to clean the area around the dents and damage. Remove any loose debris or flaking paint to ensure a smooth surface.
- Apply heat: For small dents, you can use a hairdryer or heat gun to warm up the area. The heat will make the metal more flexible and easier to reshape.
- Use a plunger: For smaller dents, a plunger can be a simple tool to pop the dent out. Wet the suction cup of the plunger and push it onto the dent. Pull the plunger back, and the suction should pop the dent outwards.
- Use a dent puller: For larger dents, a dent puller can be used. These tools use suction and leverage to pull the dent out. Follow the manufacturer’s instructions for proper use.
- Consider body filler: If the dent has caused a break in the paint or has left a noticeable crease, you may need to use body filler to smooth out the area. Apply the filler and sand it down to create a smooth surface.
- Primer and paint: After the dents have been repaired and the body panels are smooth, you can apply primer to the area. Once the primer is dry, you can paint the panels to match the rest of the car. Make sure to use the correct paint color and finish.
Repairing dents and body panels can be a challenging task, especially for larger or more severe damage. If you’re not confident in your abilities, it’s best to seek professional help to ensure a quality repair job.
Masking and Taping Off Non-Paint Areas
When your car is being painted after an accident, it’s important to properly mask and tape off non-paint areas to protect them from overspray or accidental paint application.

Here are some steps to follow for masking and taping off non-paint areas:
- Identify non-paint areas: Before you start masking, identify the areas of your car that don’t need to be painted. This can include windows, rubber gaskets, trim, headlights, and taillights.
- Prepare the masking materials: Gather the necessary masking materials, such as masking tape, plastic sheeting, paper, and plastic bags. Make sure they are clean and free of dirt or debris.
- Clean the non-paint areas: Before applying any masking materials, clean the non-paint areas thoroughly. Use a gentle car cleaner and a soft cloth to remove any dirt, grime, or wax that could interfere with the adhesion of the masking materials.
- Tape off the non-paint areas: Start by using wide masking tape to cover large non-paint areas like windows and trim. Press the tape firmly to ensure a tight seal. For smaller or irregularly shaped areas, use narrow masking tape or even creative masking techniques like crumpled paper or plastic bags.
- Apply plastic sheeting: Cover any large non-paint areas, such as the windshield or side mirrors, with plastic sheeting. Secure the sheeting with masking tape to prevent it from flapping or moving during the painting process.
- Inspect the masking job: Take a step back and carefully inspect your masking job. Make sure all non-paint areas are completely covered and taped off. Look for any gaps or areas where overspray could potentially reach.
- Double-check for tight seals: Run your hand gently over the edges of the masking tape to ensure they are securely adhered. If you notice any loose or weak areas, reinforce them with additional masking tape.
- Communicate with the painter: Before handing over your car to the painter, point out the masked off areas and discuss any specific instructions or concerns you may have. Good communication is essential to ensure that your non-paint areas are protected during the painting process.
By following these steps, you can help prevent any unwanted paint from reaching non-paint areas of your car while it’s being painted after an accident. This will ensure a clean, professional-looking finish once the painting process is completed.
Applying Primer to Ensure Proper Adhesion
When it comes to getting your car completely repainted after an accident, applying primer is an essential step in the process. Priming the surface of your car before painting it will not only help the new paint adhere properly, but it will also protect the underlying metal from corrosion.
Why is primer important?
Primer acts as a bonding agent between the original paint and the new coat of paint. It creates a smooth and even surface for the paint to adhere to, ensuring a long-lasting finish. Without a proper primer, the paint may not adhere correctly and result in a subpar paint job.
Additionally, primer also helps to prevent corrosion on the metal surface of your car. The primer creates a barrier, protecting the metal from moisture and other elements that can cause rust.
Types of primer:
There are several types of primer available for different paint jobs:
- Epoxy primer: This type of primer is ideal for bare metal surfaces. It provides excellent adhesion and corrosion resistance.
- Etching primer: When dealing with glossy or non-porous surfaces, such as chrome or aluminum, an etching primer is recommended. It helps the paint adhere to the surface better.
- High-build primer: Used for repairing minor surface imperfections, high-build primer creates a thick layer that can be sanded down for a smooth finish.
How to apply primer:
- Start by cleaning the surface of your car thoroughly. Remove any dirt, grease, or loose paint.
- Use sandpaper to roughen up the surface slightly. This will help the primer adhere better.
- Mask off any areas that you don’t want to be primed.
- Apply the primer using a spray gun or a brush. Make sure to apply it evenly and cover the entire surface.
- Let the primer dry completely before proceeding with the painting process.
Conclusion:
Applying primer is a crucial step in getting your car completely painted after an accident. It ensures proper adhesion of the new paint and protects the underlying metal surface from corrosion. By choosing the right type of primer and following the application process correctly, you can achieve a professional-looking and long-lasting paint job for your car.
Mixing and Applying the Base Coat
When it comes to getting your car painted after an accident, knowing how to properly mix and apply the base coat is crucial. The base coat is the first layer of paint that is applied to your car and it provides the color and depth for the final finish.
Mixing the Base Coat
Before you begin mixing the base coat, make sure you have the correct color code for your car. This can usually be found on the driver’s side door jamb or in the owner’s manual. Once you have the correct color code, you can purchase the base coat paint from an automotive supply store.
Follow the instructions on the paint can to mix the base coat. This typically involves combining the paint with a reducer or thinner to achieve the proper consistency. Be sure to mix the paint thoroughly to ensure an even color.
Applying the Base Coat
Before applying the base coat, make sure the surface of your car is clean and free of any dirt or debris. Use a microfiber cloth and a mild soap solution to wash the car and then dry it thoroughly.
Once the car is clean, you can begin applying the base coat. It is recommended to use a paint sprayer for the best results, but you can also use a paintbrush if necessary. Start by applying a thin, even coat of base coat to the entire surface of the car.
- Hold the sprayer or paintbrush about 6-8 inches away from the car.
- Moving in a smooth, sweeping motion, apply the base coat to the car.
- Overlap each pass slightly to ensure even coverage.
- Continue applying the base coat until the entire car is covered.
After applying the first coat, allow it to dry according to the manufacturer’s instructions. Once dry, you can apply additional coats of base coat as needed to achieve the desired level of coverage and color depth.
Remember to always follow the instructions provided by the paint manufacturer and take the necessary safety precautions when working with paint and paint products. Taking the time to properly mix and apply the base coat will ensure a professional-looking finish for your car after an accident.
Applying Clear Coat for Gloss and Protection
After completing the painting process, the next step is to apply clear coat to your car for a glossy finish and protection. Clear coat acts as a protective layer on top of the base coat, enhancing the appearance of your car’s paint job and safeguarding it from the elements.
Materials needed:
- Clean microfiber cloth
- Sanding block
- 400 or 600 grit sandpaper
- Clean water
- Clear coat spray
- Masking tape
- Respirator mask
Step 1: Prepare the Surface
Before applying the clear coat, ensure that the surface is smooth and free of any imperfections. Use a clean microfiber cloth to wipe away any dust particles. If there are any rough areas or imperfections, use a sanding block and 400 or 600 grit sandpaper to smooth them out. Clean the surface again with water and allow it to dry completely.
Step 2: Protect Surrounding Areas
To avoid overspray, carefully mask off any areas of your car that you do not want the clear coat to touch. This includes windows, trim, and any other parts that you want to keep paint-free. Use masking tape to secure the edges and create clean lines.
Step 3: Apply the Clear Coat
Put on a respirator mask to protect yourself from the fumes. Shake the clear coat spray can vigorously for about a minute to mix the contents thoroughly. Hold the can about 8 to 12 inches away from the surface and apply a light, even coat of clear coat. Keep your hand moving in a smooth, sweeping motion to achieve an even coverage. Allow the first coat to dry completely.
Step 4: Apply Additional Coats
For a complete and durable finish, it is recommended to apply multiple coats of clear coat. Apply additional coats following the same technique as in step 3, allowing each coat to dry completely before applying the next. The number of coats needed may depend on the manufacturer’s instructions or personal preference.
Step 5: Finishing Touches
After the final coat has dried, inspect the surface for any areas that may need additional touch-ups. Use sandpaper to smooth out any rough spots or imperfections if necessary. Wipe away any dust particles with a clean microfiber cloth.
Note: It is important to follow the instructions specific to the clear coat product being used, as different brands and types may have different application techniques and drying times. Always work in a well-ventilated area and follow safety precautions.
Congratulations! You have now completed the process of applying clear coat to your car for a glossy finish and added protection. Your car’s paint job will now have a beautiful shine and be better protected against the elements.
Buffing and Polishing for a Smooth Finish
After getting your car painted following an accident, it is important to give it a final touch to achieve a smooth and flawless finish. Buffing and polishing are two essential steps that can help you achieve this goal.
Buffing:
Buffing is the process of using a rotary buffer or a dual action polisher to remove any imperfections in the paint, such as swirl marks, scratches, or oxidation. The buffer or polisher is fitted with a foam pad that spins or oscillates at high speeds, allowing the abrasive compound to effectively remove the imperfections.
Polishing:
Polishing is the next step after buffing, and it helps to restore the shine and smoothness of the paint. Unlike buffing, polishing does not involve the use of abrasive compounds. Instead, it utilizes a fine polishing compound or glaze that helps to remove any remaining imperfections and enhance the clarity and depth of the paint.
Steps for buffing and polishing:
- Start by thoroughly cleaning the car to remove any dirt, debris, or leftover compounds from the painting process.
- Use a clay bar to remove any embedded contaminants on the paint surface that may have occurred during the painting process.
- Apply a buffing compound to the foam pad on the buffer or polisher, ensuring even distribution.
- Work in small sections, applying the buffer or polisher with moderate pressure in a circular motion. Keep the machine moving at all times to avoid burning the paint.
- After buffing, wipe off any excess compound residue with a clean microfiber cloth.
- Switch to a polishing compound or glaze and repeat the process to achieve a high-gloss shine.
- Finally, apply a wax or sealant to protect the newly polished paint and enhance its longevity.
Remember to always follow the manufacturer’s instructions when using buffing and polishing compounds, and test them on a small, inconspicuous area of the car before proceeding with the entire surface.
In conclusion, buffing and polishing are crucial steps in the car painting process after an accident. They help to eliminate imperfections, restore the shine, and create a smooth finish that will make your car look as good as new. So, don’t skip these essential steps and give your car the complete makeover it deserves!
Caring for Your Newly Painted Vehicle
After getting your car painted following an accident, it’s important to take some extra precautions to ensure that your new paint job stays looking fresh and vibrant for as long as possible. Here are some key tips to guide you in caring for your newly painted vehicle:
- Wash your car regularly: Keeping your car clean is essential in maintaining its new paint. Regularly wash your car using a mild car wash soap and a soft sponge or microfiber cloth. Avoid using harsh detergents or abrasive materials that could damage the paint.
- Use a high-quality wax: Applying a layer of wax to your car helps protect the paint from UV rays, dirt, and other contaminants. Choose a high-quality car wax and follow the manufacturer’s instructions for application.
- Avoid harsh chemicals: When cleaning your car, avoid using harsh chemicals such as bleach, ammonia, or solvents. These substances can strip away the protective layers of wax and damage the paint.
- Protect your car from the elements: Whenever possible, park your car in a covered area or in the shade to minimize exposure to the sun, rain, and other environmental factors that can fade or damage the paint over time.
- Be mindful of bird droppings: Bird droppings contain acids that can quickly damage the paint on your car. If you notice any bird droppings on your vehicle, clean them off as soon as possible to prevent any long-term damage.
- Watch out for scratches: Avoid parking too close to other cars or objects that could potentially scratch your newly painted car. If you do notice any scratches, have them repaired promptly to prevent them from spreading or causing further damage.
- Consider paint protection film: If you want to provide an extra layer of protection for your car’s paint, consider applying paint protection film. This transparent film helps shield the paint from scratches, chips, and other minor damages.
- Regularly inspect your car: Periodically inspect your car’s paint for any signs of damage or fading. If you notice any issues, address them promptly to prevent further deterioration.
- Stay on top of maintenance: Keeping up with regular maintenance tasks such as oil changes, tire rotations, and fluid checks can also contribute to the overall well-being of your car, including its paint.
By following these care tips, you can help prolong the life and appearance of your newly painted car, allowing you to enjoy its fresh and vibrant look for years to come.
Q&A:
What should I do immediately after a car accident that damages the paint?
Immediately after a car accident that damages the paint, you should assess the extent of the damage and take photos for insurance purposes. It is also important to exchange information with the other driver and contact your insurance company to report the accident. If the damage is severe, you may need to have your car towed to a repair shop.
Can I get my car painted after an accident or should I just repair the damaged area?
If the damage to your car’s paint is extensive or if you want to improve the overall appearance of your vehicle, it is generally recommended to get your car painted after an accident. Painting the entire car ensures that the color and finish will match perfectly, creating a seamless look.
How long does it take to get a car painted after an accident?
The time it takes to get a car painted after an accident can vary depending on the extent of the damage and the availability of materials and equipment. On average, the painting process can take anywhere from a few days to a couple of weeks. It is best to consult with a professional auto body shop to get a more accurate estimate for your specific situation.
How much does it cost to get a car painted after an accident?
The cost of getting a car painted after an accident can vary depending on several factors, such as the size of the vehicle, the extent of the damage, and the quality of paint and materials used. On average, you can expect to pay anywhere from $500 to $3000 for a complete paint job. It is recommended to get quotes from different auto body shops to compare prices and services.
Can I choose a different color when getting my car painted after an accident?
Yes, you can choose a different color when getting your car painted after an accident. This is actually a great opportunity to give your vehicle a new look. However, keep in mind that changing the color of your car may affect its resale value, as some buyers prefer original factory colors. It is best to consult with a professional auto body shop to discuss your options and make an informed decision.
What should I do if my car gets damaged in an accident?
If your car gets damaged in an accident, the first thing you should do is assess the damage and contact your insurance company. They will guide you through the claims process and help you get your car repaired.
How much does it cost to get a car painted after an accident?
The cost of getting a car painted after an accident can vary depending on the extent of the damage and the type of paint job you choose. On average, you can expect to pay anywhere from $500 to $5,000 for a car paint job after an accident.